This method uses the pre-built libraries and does not use CMake.
Summary of Steps
- Download OpenCV and VisualStudioExpress
- Install Visual Studio Express, Extract OpenCV
- Edit System Environment Variables
- Add OPENCV_DIR with the address C:\opencv\build\x64\vc14 (according to where you have extracted)
- Add %OPENCV_DIR%\bin to the Path
- Make a new project in Visual Studio and and open the property manager and add a new property sheet under the Debug | x64 folder
- Make 3 changes in the property sheet
- C/C++->General->Additional Include Directories-> Add $(OPENCV_DIR)\..\..\include
- Linker->Input->Additional Dependencies option->Add opencv_world310.lib
- Linker->General->Additional Library Directories-> Add $(OPENCV_DIR)\lib
- Test and Display an image
- Select the project, and add a new C++ file under the source files option
- Paste the following code.
- Change the solution platform to x64 and select Build Solution
- Open the Project2/x64/Debug folder and add an image
- Open command prompt and change to the above folder and run it as Project2.exe image_name.jpg
Download OpenCV and VisualStudio
- OpenCV
- VisualStudioExpress : Download the express edition for desktop
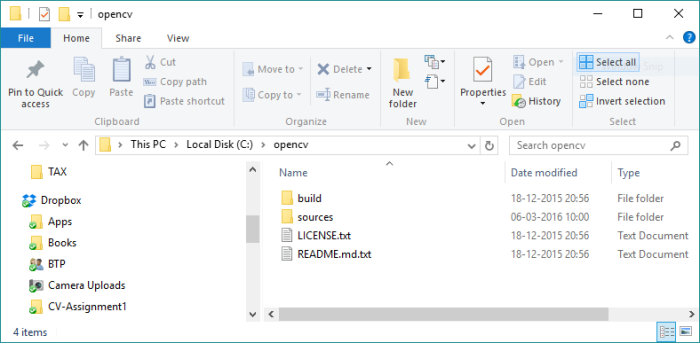
Run the opencv1-3.1.0.exe file and copy the extracted folder to C:/
Install VisualStudio Express. This will take some time and you will be asked to restart your computer after installation is done.
Set-up Environment Variables
Select Start->Edit the System Environment Variables->Environment Variables
In the System Environment Variables section select New add
OPENCV_DIRwith the address C:\opencv\build\x64\vc14
(or something similar according to where you have kept the extracted files)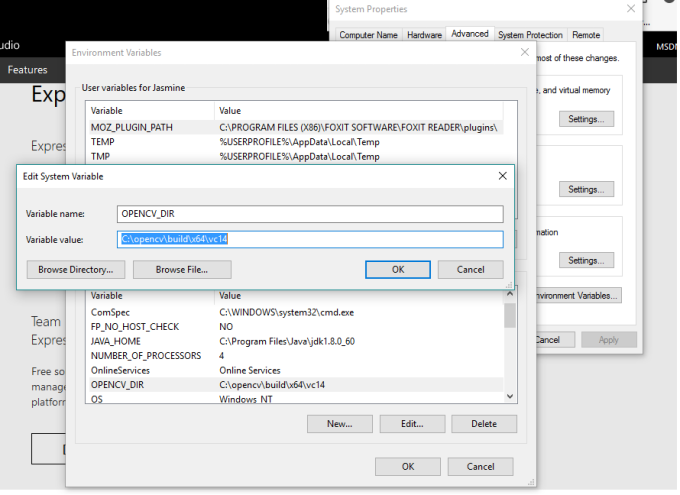
Now in the same tab,Open the Path and add
%OPENCV_DIR%\bin
Environment Variables are set
Create Property Sheet
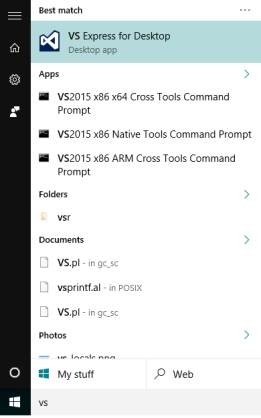
Now open Visual Studio by going to Start Menu and searching for VS Express for Desktop
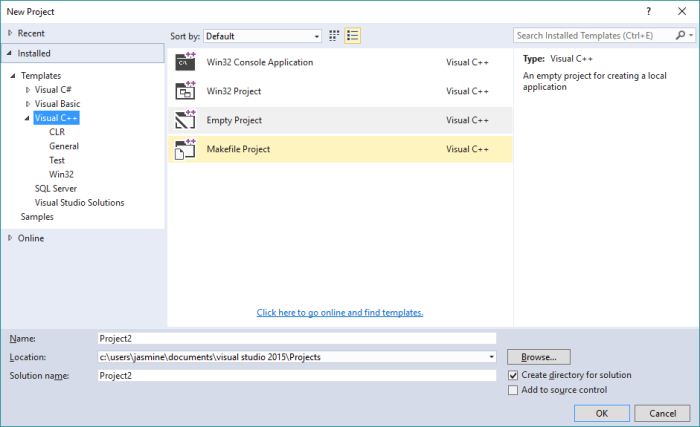
On the start page, select NewProject.
Now select Visual C++ project and then select empty project.
Open Property Manger by going to
View->Other Windows->Property Manger
Expand the selected project and select Debugx64(Assuming you are using 64-bit version)
Select Add new Project Property Sheet and save it as OpenCV_Debug

Now right click OpenCV_Debug and select properties.
Now select C/C++->General and under Additional Include Directories add
$(OPENCV_DIR)\..\..\include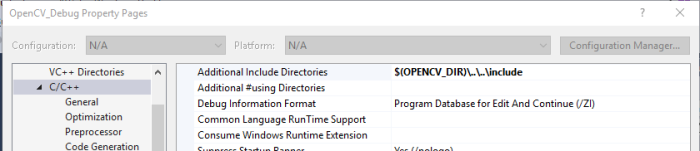
Now go to the Linker->General and under the Additional Library Directories add the libs directory.
$(OPENCV_DIR)\lib
Now go to Linker->Input and under the Additional Dependencies option add
opencv_world310.lib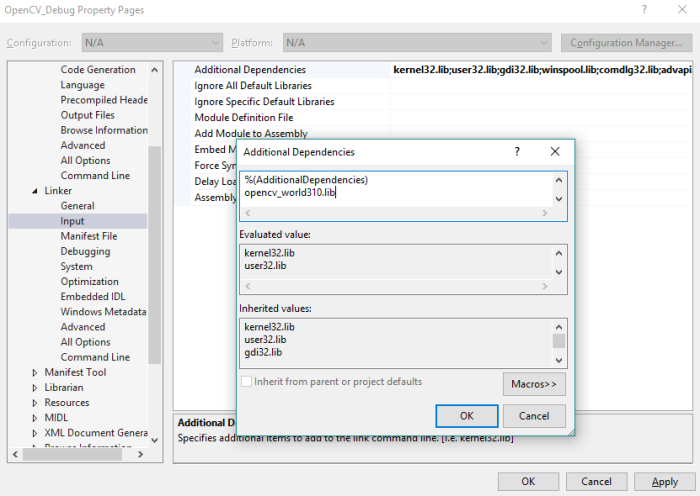
Run Hello World – Display an image
In Visual Studio, select View->Solution Explorer.
Now select your project, right-click on Source Files ->Add->New Item
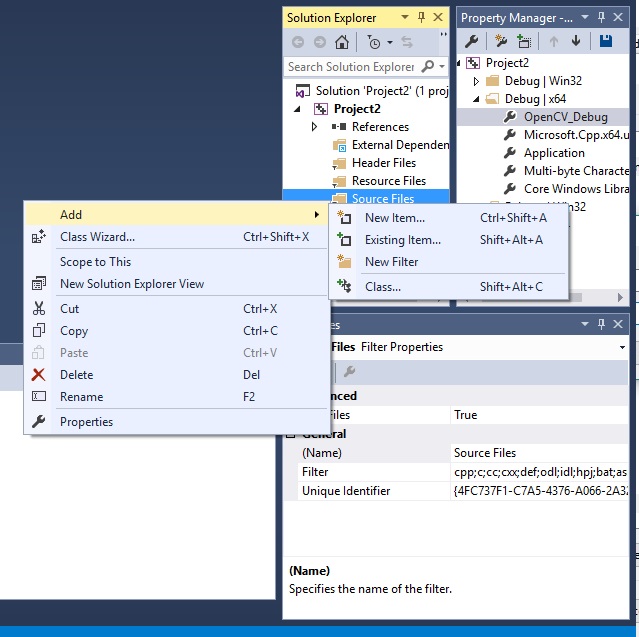
Next, select C++ file , add
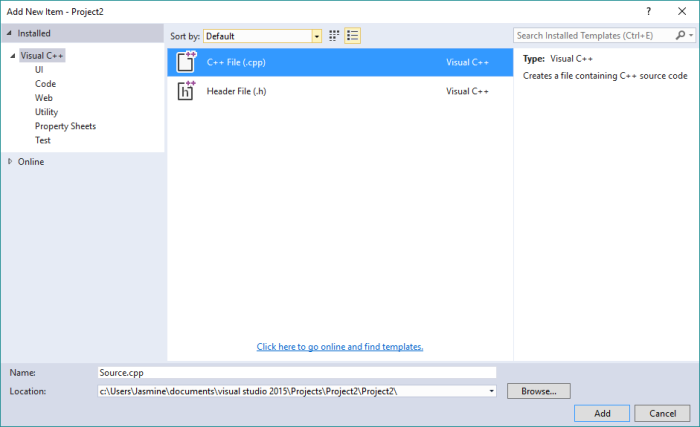
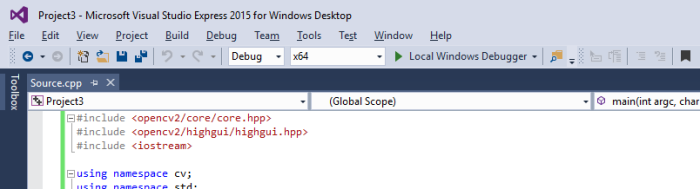
Now paste the following code as taken from this link
#include <opencv2/core/core.hpp>
#include <opencv2/highgui/highgui.hpp>
#include <iostream>

using namespace cv;
using namespace std;

int main( int argc, char** argv )
{
if( argc != 2)
{
cout <<" Usage: display_image ImageToLoadAndDisplay" << endl;
return -1;
}

Mat image;
image = imread(argv[1], IMREAD_COLOR); // Read the file

if(! image.data ) // Check for invalid input
{
cout << "Could not open or find the image" << std::endl ;
return -1;
}

namedWindow( "Display window", WINDOW_AUTOSIZE ); // Create a window for display.
imshow( "Display window", image ); // Show our image inside it.

waitKey(0); // Wait for a keystroke in the window
return 0;
}
Next, select the solution platform as x64.
Now select Build Solution and you should see Build: 1 succeeded.
If you do get errors , recheck your property sheet and also make sure you have set the solution platform to x64.
Run the application
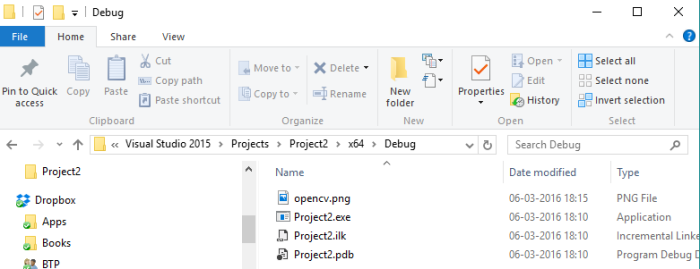
Open the folder x64/Debug in your Project folder
e.g C:\Users\Jay\Documents\Visual Studio 2015\Projects\Project2\x64\Debug
You should see an exe file here, add a picture in the folder.
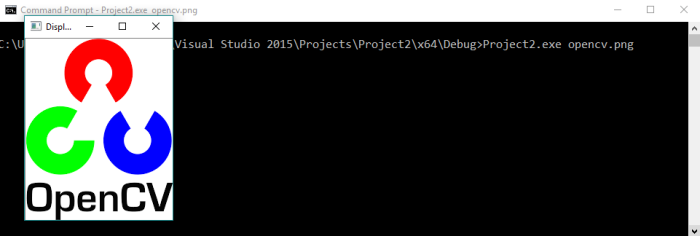
Now open Command Prompt and go to the same folder by typing
cd "C:\Users\Jay\Documents\Visual Studio 2015\Projects\Project2\x64\Debug"Now run your application by entering
Project2.exe opencv.pngAnd you should see the image.
I referred to the following links, take a look at them to understand the details or sort out any issues.
OpenCV on Windows Visual Studio
